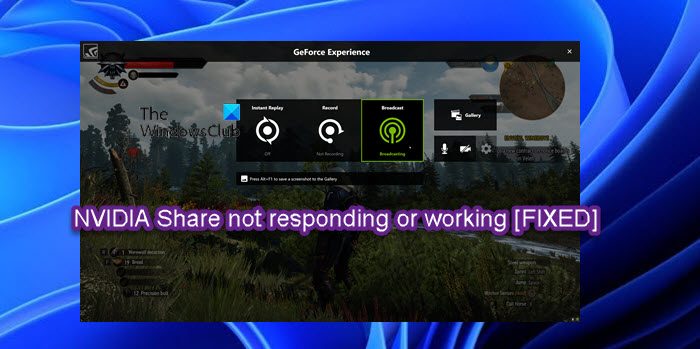
Some PC users are reporting the issue whereby when launching the GeForce Experience application on their Windows 11 or Windows 10 PC, they receive the error message NVIDIA Share not responding or has stopped working. If you face this issue, then this post may help you.
NVIDIA Share allows PC users to record and share gaming moments during gameplay. The utility is practically a hardware acceleration screen recording feature that enables users to record a time behind and provides users a lot of flexibility when playing games. But if the feature is turned on but not in use, it can cause a black screen for a few seconds on startup. This issue is often related to an incompatible or outdated graphics card driver.
NVIDIA Share not responding or has stopped working
If NVIDIA Share is not responding or has stopped working on your Windows 11/10 system, you can try our recommended solutions below in no particular order and see if that helps to resolve the issue on your device. Let’s take a look at the description of the process involved concerning each of the listed solutions. Before you try the solutions below, check for updates and install any available bits on your Windows 11/10 device and see if that helps – but, if the issue in focus started after you recently updated Windows, you can perform System Restore or uninstall the update – but if you prefer not to do neither, you can then go ahead with the solutions below.
1] Restart PC
Your first port of call in an attempt to troubleshoot and fix the NVIDIA Share not responding or working issue on your Windows 11/10 device is to restart your PC and make sure to run GeForce Experience app with admin privilege.
2] Update/Rollback graphics adapter driver
This solution simply requires you to update the graphics card driver on your PC using any of the following methods:
In Windows Update, you can as well get the driver updates on the Optional Updates section.You can download the latest version of the driver from the graphics hardware manufacturer’s website.You can automatically update your drivers using any of the free Driver Update software for Windows 11/10 PC.You can also update driver via Command Prompt.You can manually update graphics driver via Device Manager if you have already downloaded the .inf or .sys file for the driver.
If you happen to have just updated the driver, there might be chances that the new installation did not take place properly or was corrupt. The incompatibility between the Operating System and the Driver might also give rise to issues like this. So, you can try to Rollback the conflicting driver. You can also check if there is another update available to your NVIDIA Drivers and check if that fixes your issues. However, if the latest drivers are already installed or after the update the issue isn’t resolved, you can rollback the driver or download and install an earlier version of the driver. If both updating and/or rolling back the driver didn’t work, you can uninstall the graphics card driver via Command Prompt or use the Display Driver Uninstaller (DDU), and then restart your PC. After your PC reboots, Windows will scan for hardware changes and automatically reinstall the generic driver for the graphics device which in some cases is sufficient enough for the display adapter to function without issues, but with possible limited functionality which wouldn’t be ideal or give the best experience for PC gaming.
3] Turn off Instant Replay
Some affected PC users reported that they were able to resolve the issue in hand by disabling Instant Replay – a feature in the NVIDIA Share utility which can help you record screens at a specifically defined time. To disable Instant Replay feature, do the following:
Open GeForce Experience.Navigate to the NVIDIA Share Settings section.Select the Instant Replay option.Click on Turn off.
Reboot your computer and check again if you have any updates for your NVIDIA Graphics Card. Now you can carry on and play your games as you want to. In case you want to leverage the use of NVIDIA Share, just follow the same steps to enable it again.
4] Reinstall GeForce Experience
This solution requires you to uninstall the GeForce Experience app via Settings app or Control Panel, reboot PC, and then download from NVIDIA official website the latest version of the app and reinstall it on your Windows 11/10 gaming device. If the issue in hand persists, uninstall the GeForce Experience app once again, but this time around, download a previous version of GeForce Experience from a trusted resource and install it on your device. Hope this helps! Related post: NVIDIA GeForce Experience unable to open Share
How do I fix NVIDIA Share EXE?
You just need to turn off NVIDIA Share in GeForce Experience. But before that, you may need to roll back the graphics card driver or update the graphics card driver for your Windows 11/10 computer.
How do I fix NVIDIA Overlay not working?
If NVIDIA Overlay is not working on your PC, try the following suggetions:
Make sure GeForce in-game overlay is enabled.Restart your computer.Update your graphics driver.Install all Windows updates.Run GeForce Experience as an administrator.Enable experimental features.Disable third-party services.Repair Microsoft Visual C++ Redistributable Package.
Why does it say unable to open Share on GeForce Experience?
If you’re getting the error unable to open Share on GeForce Experience, it’s likely due to some incompatibility issue (your previous drivers) or corrupted files. The most common solution for this is to completely reinstall the application rather than updating it.

