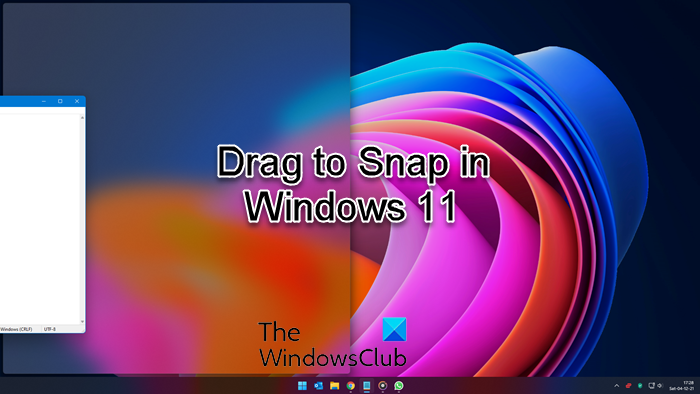
What is Drag and Drop Snap to Grid feature in Windows 11?
Like Windows 10, Windows 11 comes with a handy feature that lets you snap a window to a particular area of the screen with the help of your mouse. You can click on the title bar of a program’s window, drag it to a corner or edge of the screen, find the possible dragging position, and release the mouse. The window will be placed in a particular area you have selected. However, if you do not like to use this feature, this article will be helpful for you. It is possible to turn on or off the Drag to Snap feature using your mouse in Windows 11 with the help of Registry Editor. As you are about to change or delete Registry values, it is recommended to backup all Registry files or create a System Restore point to be on the safe side.
How to disable Drag and Drop Snap to Grid in Windows 11
To turn off Drag and Drop Snap to Grid in Windows 11, follow these steps:
Enable or Disable Snap Layouts on Top of Screen on Windows 11
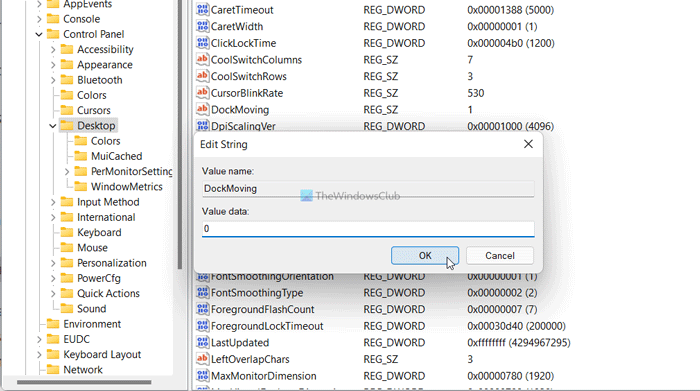
To get started, you need to open the Registry Editor on your computer. For that, press Win+R to open the Run prompt, type regedit, and press the Enter button. If the UAC prompt appears, click on the Yes option. Once the Registry Editor is opened on your computer, navigate to the following path: Here you can find two REG_DWORD values named DockMoving and WindowArrangementActive. By default, they should come with Value data as 1. You need to double-click on each of them to set the Value data as 0.
Click the OK button to save the change. Next, you must restart your computer or sign out of your account and re-sign into it to get the change. Once done, you cannot use your mouse to snap a window on your screen. Read: Windows 11 Smart Layouts, Snap Layouts and Snap Groups explained.
How to enable Drag and Drop Snap to Grid in Windows 11
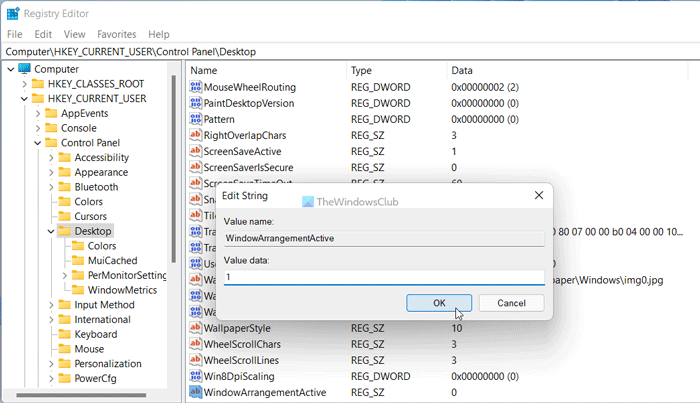
To enable drag to snap in Windows 11, follow these steps: Open Registry Editor. For that, you can search for regedit in the Taskbar search box and click on the individual search result. Following that, you can find the UAC prompt on your screen. If so, click on the Yes button. Next, you need to navigate to this path: In the Desktop key, you can find two REG_DWORD values called DockMoving and WindowArrangementActive. Double-click on the DockMoving DWORD value and set the Value data as 1.
Click the OK button. Similarly, double-click on the WindowArrangementActive DWORD value, set the Value data as 1, and click the OK button. However, if you cannot find these two REG_DWORD values, you need to create them manually. For that, right-click on the Desktop > New > DWORD (32-bit) Value and name them DockMoving and WindowArrangementActive. Once done, you need to restart your computer or sign out and sign in to your user account. Read: How to enable or disable Snap Layouts on Windows 11.
How do I turn off snapping in Windows?
To turn off the drag to snap with mouse feature in Windows 11, you can use the Registry Editor. For that, open the Registry Editor, navigate to HKEY_CURRENT_USER\Control Panel\Desktop, double-click on the DockMoving REG_DWORD value, and set the value data as 0. Similarly, double-click on the WindowArrangementActive REG_DWORD value and set the Value data as 0. Then, click the OK button and restart your computer.
How do I change my Snap settings on Windows?
To change the Snap settings on Windows 11, you can use the Windows Settings panel. For that, press Win+I to open Windows Settings and ensure that you are in the System tab. If so, click on the Multitasking menu on the right-hand side. Next, toggle the Snap windows option to turn it on. Click on it to expand this section, where you can find several options to change snapping functionality for different purposes. Read: How to enable or disable Snap Layouts on Windows 11.