Change Time Server in Windows 11/10
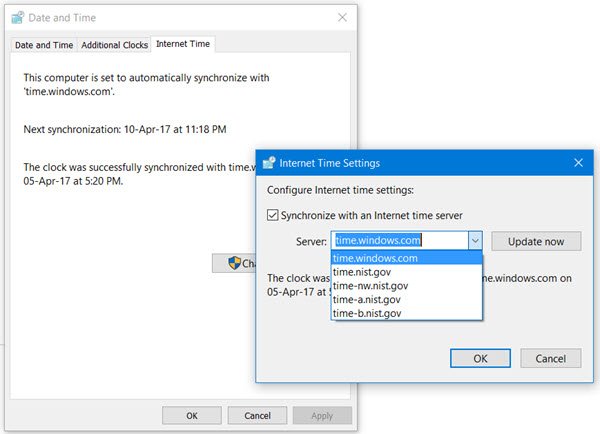
Type “Control Panel” in Start search and hit Enter to open the Control Panel of your Windows 10 PC. Type “Date and Time” in the search box and click on the result. Click on the ‘Internet Time’ tab and hit on the ‘Change Settings’ button. From the drop-down menu, select, say, time.nist.gov as the Server and hit the ‘Update now’ button. If you receive any error, try using pool.ntp.org as your time server and then hit the Update Now button. Make sure you select the checkbox saying, Synchronize with an internet time server.
Add new Time servers to Windows 11/10
If you want to add more time servers to the drop-down list, open Registry Editor and go to the below path- This will show you the list of current servers available-time.windows.com
time-nist.govtime-nw.nist.govtime-a.nist.govtime-b.nist.gov
If you wish to add Time Servers, you could use the following for instance, or any other one of your choice:
pool.ntp.orgisc.org
Just select the server you want to add, right-click anywhere on the right side and select New > String Value. Enter the next number and give the Time server’s address in the Value field. Once done, go back to the Date and Time settings, select your server and click on Update Now button.
Force Windows to sync Time using CMD
You can also force Windows to sync Time using W32tm.exe. W32tm.exe is a command prompt line used to configure, monitor or troubleshoot the Windows Time Service in Windows 10 PC. To do this, open an elevated command prompt and type the following commands one after the other: Reboot your computer and see if it has helped.