What does Enter Network credentials mean?
Network Credentials simply means a user ID and password created by the end-user in the case of a Home network or an IT administrator in the case of a domain environment, which is required to be entered into the computer you’re trying to connect to. This credential can be a Microsoft Account or a Local Account ID.
How do I stop asking for Network credentials?
PC users that want to stop receiving network credentials prompt can turn off password protected sharing by following these steps: Type Network and Sharing Center in the search bar on the Windows taskbar, select Advanced Sharing Setting, select Turn off password protected sharing for all networks.
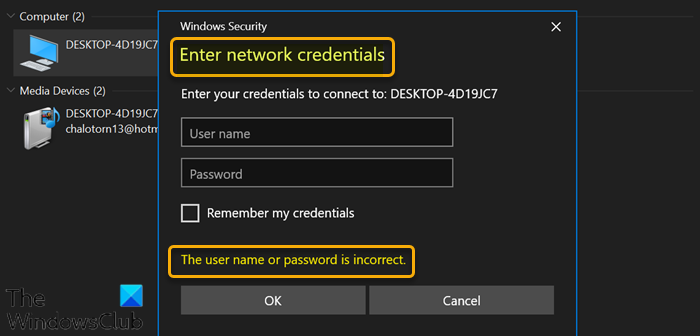
Fix Enter network credentials error in Windows
If you’re constantly faced with this Enter network credentials error on your Windows 11/10, you can try our recommended solutions below in no particular order and see if that helps to resolve the issue. Let’s take a look at the description of the process involved concerning each of the listed solutions. Before you try any of the solutions below, try to use the username and password for your Microsoft account instead of that of your local account for your Windows computer and see if you can log on without issues. Also, you can try using the Computer Name and Account Name as the Username. Assuming you want to access another computer named as TWC7, and suppose the account name on that computer is Obinna, you can input the username as TWC7Obinna without spaces, and then input your password.
1] Clear all credentials from Credential Manager
The first thing you can try is to clear all credentials from Credentials Manager on your Windows 11/10 PC and see if the Enter network credentials error is resolved. Otherwise, try the next solution.
2] Disable Credential Manager Service automatic Startup
To disable Credential Manager Service automatic Startup on your Windows PC, do the following:
Press Windows key + R to invoke the Run dialog.In the Run dialog box, type services.msc and hit Enter to open Services.In the Services window, scroll and locate the Credential Manager service.Double-click on the entry to edit its properties.In the properties window, click the drop-down on the Startup type and select Disabled.Click Apply > OK to save changes.Exit Services console.Restart PC.
Try connecting and if the issue isn’t resolved, try the next solution.
3] Turn off password-protected sharing
To turn off password protected sharing on your Windows PC, do the following:
Right-click the network status icon on the notification area on the taskbar.Select Open Network and Internet settings.On the Network and Internet settings page, click Network and Sharing Center on the right pane.On the Network and Sharing Center Control Panel, click the Change advanced sharing settings link on the left navigation pane.In the Advanced sharing settings window, click on All Networks.Under Password-protected sharing section, select the radio button for Turn off password-protected sharing.Click on Save Changes.Exit Control Panel.Restart PC.
On boot, see if the issue is resolved. If not, proceed with the next solution.
4] Modify Local Security Policy
Do the following:
Press Windows key + R to invoke the Run dialog.In the Run dialog box, type secpol.msc and hit Enter to open Local Security Policy console.In the console, on the left navigation pane, click Local Policies > Security Options.On the right pane, double-click the Accounts: Limit local account use of blank passwords to console logon only policy to edit its properties.In the properties page, select the radio button for Disabled.Click Apply > OK.Exit Local Security Policy manager.Restart PC.
Try the next solution if the issue is unresolved.
5] Add the credentials in Credentials Manager
It could be the credentials you’re trying to use to logon to the computer on the network is not stored in the Credential Manager. If this is the case, you can add the credentials in Credential Manager. To add the credentials in Credential Manager on your Windows PC, do the following:
Type credentials in the search box.Choose Credential Manager from the list of results.Click the Windows Credentials bar.Click Add a Windows Credential.In the Add a Windows Credential page, fill in the network address, user name and password related to the computer that you want to access.Click OK when done.Exit Credential Manager.Restart PC.
Now, try logging into the computer; if unsuccessful with the same issue, you can try the next solution.
6] Set IP address to automatic
If the IP address for your Windows PC is not configured properly you’ll encounter this error when you are trying to access other computers on the same network. To rule out the possibility of incorrect IP address as a culprit to this issue, do the following:
Press Windows key + R to invoke the Run dialog.In the Run dialog box, type ncpa.cpl and hit Enter to open Network Connections control panel.Next, right-click on the network connection you are using and click on Properties.Select and double-click the Internet Protocol Version 4 (TCP/IPv4) option to edit its properties. In the General tab, make sure the radio button is set to Obtain an IP address automatically and Obtain DNS server address automatically.Click OK to save the changes.Click OK again to exit Network Connections properties.Exit Control Panel.Restart PC.
See if you can now logon successfully, otherwise try the next solution.
8] Change Network Profile to Private
If your network profile is set as Public, you may encounter this issue. In this case, you can set your network profile to Private – this will help as Windows will allow access to the network. Any of these solutions should work for you! Related post: Your Credentials did not work in Remote Desktop on Windows.